
Understanding Vapor Barrier Installation
What is a Vapor Barrier?
A vapor barrier is a material designed to resist the diffusion of moisture through walls, floors, and ceilings. Typically made of polyethylene plastic, rubber, or metal foil, these barriers are crucial in managing moisture in various structures, especially basements and crawl spaces. By creating a barrier through which moisture cannot easily pass, they protect building materials from water damage and mold, contributing to healthier indoor environments.
Importance of Vapor Barrier Installation
The installation of a vapor barrier is essential for maintaining the integrity of a building. Without proper vapor control, moisture can accumulate, leading to structural damage, mold growth, and weakened air quality. It is particularly vital in climates with high humidity or in areas subjected to significant rainfall. By investing in Vapor Barrier Installation, homeowners can prevent costly repairs and ensure that their living space remains comfortable and safe.
Materials Used in Vapor Barrier Installation
Vapor barriers can be made from various materials, but each has unique properties and uses. The most common materials include:
- Polyethylene Sheets: These are the most prevalent vapor barriers due to their cost-effectiveness and good moisture resistance.
- Foil Barriers: Often used in metal buildings, foil provides excellent moisture management and thermal insulation.
- Rubber or Vinyl: Durable options typically used in commercial applications or areas with high moisture exposure.
Choosing the right material depends on the specific conditions of the area where the barrier will be installed.
Step-by-Step Guide to Vapor Barrier Installation
Preparation for Installation
Before beginning installation, thorough preparation is necessary. This includes assessing the area where the vapor barrier will be placed. Clear any debris, ensure the ground is level, and fix any issues such as leaks or cracks. Additionally, determining the correct type of vapor barrier for your specific climate and building type is essential. Make sure to gather all required tools, such as a utility knife, measuring tape, and duct tape, before diving into the installation process.
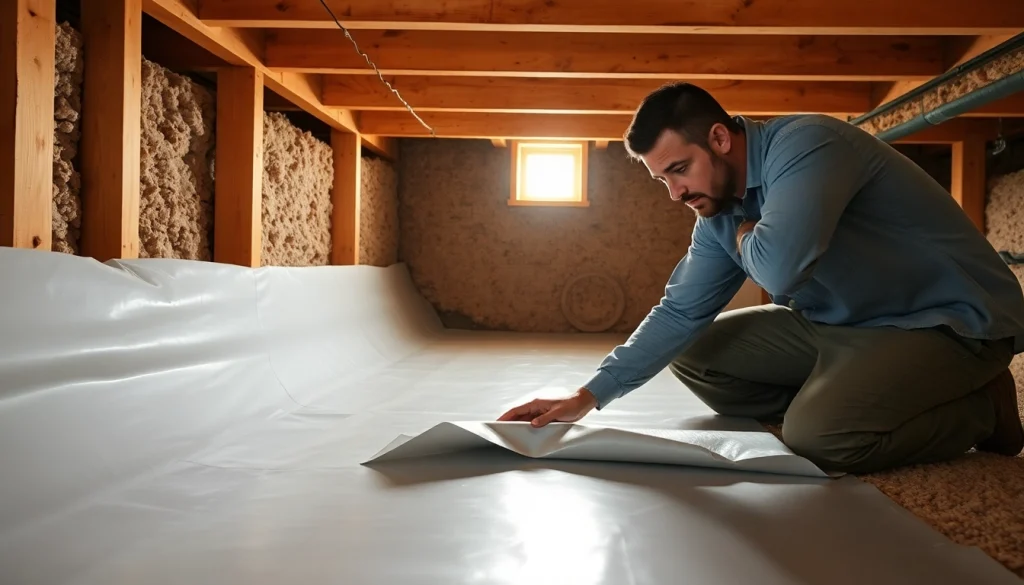
Installation Process Explained
The actual installation of a vapor barrier involves several key steps:
- Measuring and Cutting: Start by measuring the area for the vapor barrier and cutting it to size, ensuring it covers all exposed surfaces.
- Securing the Barrier: Lay down the vapor barrier with the shiny side facing up (for foil barriers) or towards the area needing protection. Overlap seams by approximately 12 inches and seal them with duct tape.
- Final Checks: After installation, double-check the barrier for gaps or tears, reinforcing any weak spots as necessary to ensure optimal moisture control.
Completion of each step is crucial for the overall performance of the vapor barrier.
Common Mistakes to Avoid
While installing a vapor barrier seems straightforward, several common mistakes can undermine its effectiveness:
- Insufficient Coverage: Not covering the entire area can allow moisture to seep through.
- Improper Sealing: Failing to tape seams tightly can lead to leaks and moisture penetration.
- Using the Wrong Material: Selecting an unsuitable vapor barrier can result in poor performance.
Avoid these pitfalls by closely following installation instructions and checking your work regularly.
Choosing the Right Vapor Barrier for Your Needs
Factors to Consider
When selecting a vapor barrier, consider the following factors:
- Climate: Humidity levels in your area can dictate the type of barrier necessary.
- Installation Area: Crawl spaces, basements, and walls each have unique requirements.
- Building Codes: Always check local regulations regarding vapor barriers.
Types of Vapor Barriers
There are several types of vapor barriers to choose from, including:
- Class I Vapor Barriers: These are impermeable (less than 0.1 perms) and are often used in extremely humid conditions.
- Class II Vapor Barriers: Moderately impermeable (0.1 to 1.0 perms), suitable for less severe conditions.
- Class III Vapor Barriers: Permeable to moisture (1.0 to 10.0 perms), used in drier environments.
Choosing the correct vapor barrier type can significantly impact its efficacy.
Cost Analysis of Vapor Barrier Installation
The cost of installing a vapor barrier can vary significantly based on material type and area size. Generally, polyethylene sheets are the most affordable option, while foil barriers may incur a higher cost due to their additional insulation benefits. On average, homeowners can expect costs ranging from $0.50 to $2.00 per square foot, depending on the complexity of the installation and local labor rates. While it might seem like a sizable investment, the protection offered by a vapor barrier can save thousands in long-term repairs.
Maintenance and Inspection of Vapor Barriers
Signs of Damaged Vapor Barriers
Regular inspection of vapor barriers is crucial to ensure their effectiveness. Signs of damage include:
- Visible Tears or Holes: Any breaches can allow moisture in.
- Mold Growth: The presence of mold usually indicates moisture ingress.
- Condensation Build-Up: If water droplets are found on the barrier, it’s a sign that moisture is not being adequately controlled.
Best Practices for Maintenance
To maintain the integrity of vapor barriers, follow these best practices:
- Routine Inspections: Check your vapor barrier at least once a year, looking for any signs of wear or damage.
- Repair Small Issues Promptly: Addressing small tears or holes immediately can prevent larger issues down the line.
- Control Humidity Levels: Using a dehumidifier can help keep moisture levels down in susceptible areas.
When to Replace Your Vapor Barrier
It may be time to replace your vapor barrier if you notice persistent signs of moisture issues, significant damage, or if you’ve made extensive renovations that could affect its performance. Replacement is also advisable every 10 to 20 years, depending on material quality and conditions.
FAQs about Vapor Barrier Installation
How does a vapor barrier work?
A vapor barrier works by preventing moisture from entering or escaping from your building materials, helping to maintain an optimal humidity level and preventing damage such as mold growth.
Can I install a vapor barrier myself?
Yes, many homeowners can successfully install a vapor barrier themselves by following detailed instructions. However, for extensive installations or unique situations, hiring a professional may be beneficial.
What are the benefits of vapor barrier installation?
The primary benefits include preventing moisture-related damage, improving indoor air quality, and protecting structural integrity, which can save on costly repairs.
How effective is a vapor barrier in preventing moisture?
When correctly installed, a vapor barrier is highly effective in preventing moisture ingress, significantly reducing the risk of mold, mildew, and structural damage over time.
What materials are best for a vapor barrier?
Polyethylene sheeting is often preferred due to its affordability and effectiveness. Foil and rubber options may also be better suited for specific conditions.